Producing agricultural waste pellets is one thing. Producing pellets that actually sell—pellets that burn cleanly, store without crumbling, transport without generating dust, and command a premium price—is something else entirely. The difference between a commodity product and a premium product often comes down to quality. And quality, in the pellet industry, is not an accident. It is the result of deliberate decisions made at every stage of the production chain, from the moment raw material enters the yard to the moment the finished pellet is bagged and shipped.
The global biomass pellet market was valued at approximately USD 10.2 billion in 2024, and buyers are increasingly selective. European import standards, for example, now require pellet durability above 97.5%, moisture content below 10%, and ash content below 6% for premium-grade fuel. Falling short of these benchmarks does not just mean a lower price—it can mean rejection at the port. For producers, improving pellet quality is not optional. It is survival.
At the center of this quality challenge sits one critical piece of equipment: the straw pelletizer. Every decision upstream and downstream of this machine ultimately affects what comes out the other end. This article provides a comprehensive, practical guide to improving agricultural waste pellet quality at every stage of production.
Understanding What “Quality” Actually Means
Before discussing how to improve quality, it helps to define what quality means in the context of biomass pellets. There are five measurable attributes that buyers and end-users care about most:
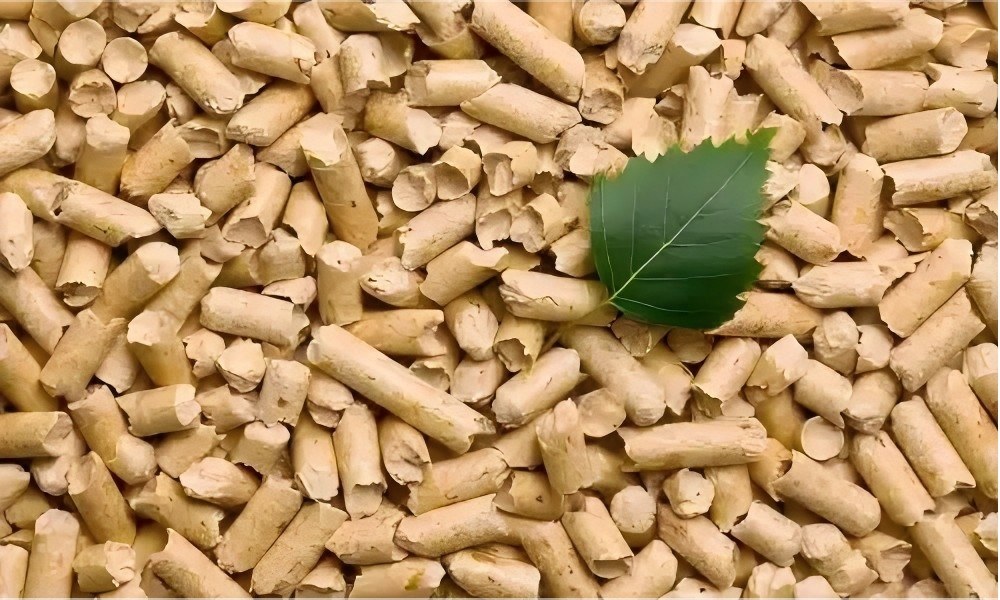
Durability refers to the pellet’s ability to resist breaking and abrasion during handling, transport, and storage. The industry standard is a durability index above 97.5% for fuel pellets and above 95% for feed pellets. Low durability means fines—broken pieces and dust—which reduce calorific value and create handling problems.
Density measures how tightly the material is compressed. Higher density means more energy per unit volume, which lowers transport costs and improves combustion efficiency. Fuel pellets typically target a bulk density of 600–750 kg/m³.
Moisture content must be controlled tightly. The ideal range is 8–10% for fuel pellets and 10–12% for feed pellets. Above 12%, pellets become soft, prone to microbial growth, and may spontaneously combust during storage. Below 6%, they become brittle and generate excessive dust.
Ash content reflects the mineral residue left after combustion. Lower ash is better. Premium fuel pellets should have ash content below 6%. High ash not only reduces energy output but also causes slagging and fouling in boilers.
Calorific value is the energy content per kilogram. Good agricultural waste pellets deliver 16–20 MJ/kg depending on feedstock. Rice husk pellets can exceed 20 MJ/kg, while wheat straw pellets typically range from 16–18 MJ/kg.
Improving quality means optimizing all five of these attributes simultaneously—and that requires a systematic approach.
Step 1: Start with the Right Raw Material
The single most impactful decision you can make is selecting the right feedstock. Not all agricultural residues pelletize equally, and no amount of downstream processing can fully compensate for a poor starting material.
Wheat straw is widely regarded as the gold standard for fuel pellets. It has a favorable lignin content (around 15–20%), good fiber structure, and produces pellets with high durability and calorific value. It is the feedstock of choice in Europe, where wheat straw pellets command the highest prices.
Rice straw is abundant but more challenging. Its silica content can reach 15% in some varieties, which accelerates wear on the straw pelletizer die and reduces pellet durability. Pre-washing rice straw to remove surface silica can improve output quality significantly, though it adds cost.
Corn stover is energy-rich and widely available in North America, but its high moisture content at harvest (often 40–60%) makes drying a critical bottleneck. If moisture is not reduced properly before pelletizing, the resulting pellets will be soft and prone to cracking.
Cotton stalk produces good pellets but requires higher compression force than straw. Operators using a straw pelletizer with insufficient motor power will see low output and poor density.
Rice husk and peanut shell are excellent for fuel pellets due to their high calorific value, but they are extremely abrasive. Without hardened alloy steel dies, equipment wear will be severe.
The rule is simple: match your feedstock to your equipment, and match your equipment to your target market.
Step 2: Sorting and Cleaning—Do Not Skip This
Contamination is the silent killer of pellet quality. Even small amounts of sand, soil, metal fragments, or plastic in the raw material can cause catastrophic die wear, produce weak pellets, and contaminate the final product.
Studies have shown that contamination rates above 5% can reduce pellet durability by as much as 15 percentage points. In unprocessed rice straw, contamination rates as high as 15% have been reported. This is not acceptable.
Invest in a proper sorting system. A vibrating screen with 10–20mm openings, followed by a magnetic separator for metal removal and a wind sifter for light contaminants, should be standard at any serious pellet plant. The cost of this equipment—typically 10,000–30,000—is trivial compared to the cost of replacing a worn die or losing a shipment to quality rejection.
Step 3: Crushing—Particle Size Matters More Than You Think
Before material enters the straw pelletizer, it must be crushed to a uniform particle size of 3–5mm. This is not a suggestion—it is a requirement for consistent pellet quality.
Oversized particles (above 8mm) do not compress properly. They create weak spots in the pellet, leading to cracking during cooling and excessive fines during transport. Undersized particles (below 1mm) act as dust, reducing density and causing the pelletizer to choke.
Use a hammer mill with adjustable screens. Check the screen wear regularly—a worn screen produces inconsistent particle sizes, and inconsistent particle sizes produce inconsistent pellets. This is one of the most common root causes of quality problems, and it is also one of the easiest to fix.
Step 4: Drying—The Most Underrated Quality Lever
Moisture control is arguably the single most important factor in pellet quality, and it is also the step where most producers cut corners.
Raw agricultural residues typically have moisture content of 30–60% at harvest. The target for pelletizing is 8–15%, depending on feedstock. Getting there requires a properly sized dryer.
Rotary dryers are the most common choice for medium to large operations. They offer high throughput and can handle sticky materials like corn stover.
Belt dryers work well for smaller operations and produce more uniform drying.
Flash dryers are ideal for straw materials because they dry quickly at high temperature, minimizing the risk of microbial degradation.
The key is to monitor moisture in real time. Install a moisture sensor on the dryer output and set an alarm at 12% moisture. If moisture is too high, pellets will be soft and will crack during cooling. If moisture is too low, pellets will be brittle and will generate dust. Both problems destroy quality.
A practical tip: do not rely on feel or appearance. Use a calibrated moisture meter. The difference between 10% and 14% moisture is invisible to the naked eye but devastating to pellet durability.
Step 5: Conditioning—The Secret Weapon
Conditioning is the step that separates good pellets from great pellets, and yet most small-scale producers skip it entirely.
Conditioning involves adding steam to the crushed, dried material before it enters the straw pelletizer. The steam raises the material temperature to 80–85°C for 30–60 seconds. This process gelatinizes the starch and softens the lignin, making the material far more compressible.
The result? Higher density, better durability, and lower energy consumption in the pelletizer. Conditioned material typically produces pellets with durability 3–5 percentage points higher than unconditioned material.
A conditioner costs 8,000–25,000 depending on capacity, and the payback is immediate. If you are serious about quality, do not skip this step.
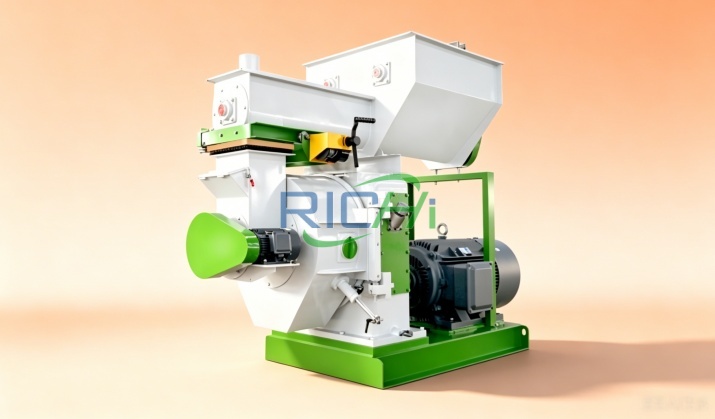
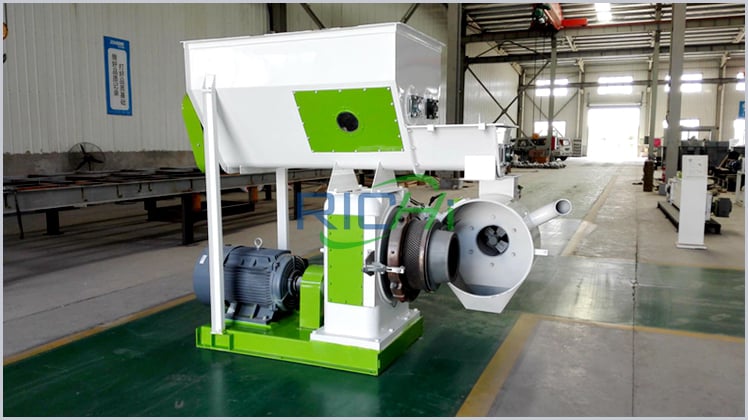
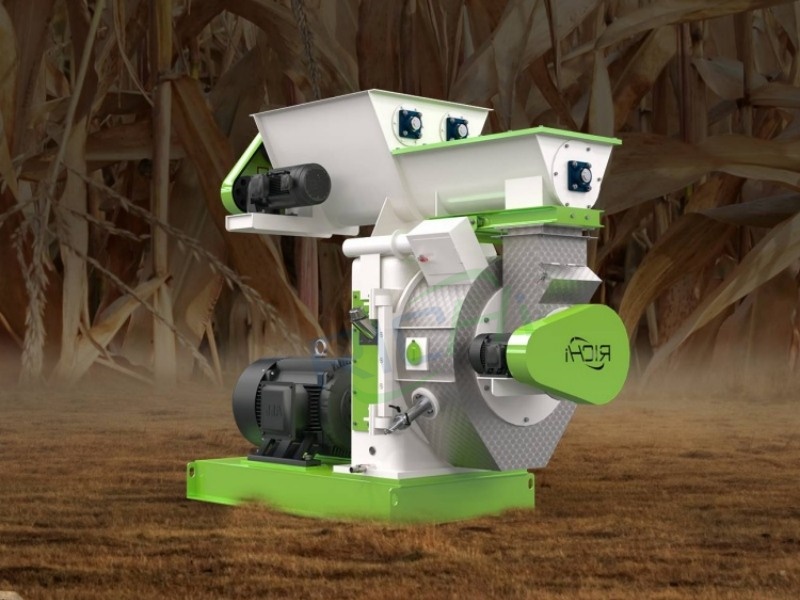
Step 6: The Straw Pelletizer—Where Quality Is Made or Broken
This is the heart of the operation. The straw pelletizer is where loose, low-density material is transformed into dense, market-ready pellets. Getting this step right is everything.
https://richipelletizer.com/straw-pellet-machine-for-sale
Choosing the Right Machine
There are two main types:
Flat-die pelletizers are suited for small-scale, farm-level production. Capacity ranges from 75–300 kg/h. They are affordable (2,000–8,000) but produce lower-density pellets and are more prone to inconsistency.
Ring-die pelletizers are the standard for commercial operations. Capacity ranges from 1–10 tons/h. They produce higher-density, more uniform pellets with superior durability. A quality ring-die straw pelletizer with a 350–508mm die, 55–110kW motor, and proper compression ratio can process wheat straw, rice straw, corn stover, and cotton stalks with minimal die wear.
For fuel pellets, choose a machine with a compression ratio of 1:6 to 1:8. For feed pellets, a higher compression ratio of 1:10 to 1:12 is recommended to ensure proper starch gelatinization.
Operating Parameters That Affect Quality
Even with the right machine, poor operating parameters will destroy quality. The three most critical settings are:
Die speed: Too fast, and material does not spend enough time in the die cavity, resulting in low density. Too slow, and throughput drops. For most straw materials, a die speed of 250–350 rpm is optimal.
Roller pressure: Insufficient pressure produces soft, crumbly pellets. Excessive pressure accelerates die wear and can cause the motor to overload. Most modern straw pelletizers have hydraulic systems that allow pressure to be adjusted in real time. Start at 70 MPa and increase gradually until pellets reach target density.
Feed rate: Overfeeding the straw pelletizer causes material to back up, producing irregular pellets with high fines content. Underfeeding wastes capacity. The feed rate should be matched to the die speed and roller pressure to maintain a steady, uniform flow.
Die Maintenance—The Most Neglected Quality Factor
The die is the most expensive and most critical component of the straw pelletizer. A quality ring die costs 3,000–15,000 depending on size and material. It must be maintained rigorously.
Before first use, the die must be conditioned. Run a mixture of 50% sand blast media, 25% straw, and 25% oily material (like soybean meal) through the machine for 30–60 minutes. This cleans the die cavities, smooths the surface, and establishes proper operating temperature. Skipping this step can reduce die life by up to 40%.
During operation, clean the die every 4–8 hours by running oil-soaked material through the machine. This lubricates the die holes and prevents buildup. Inspect the die weekly for wear. When hole diameter increases by more than 0.2mm, replace the die. Worn dies produce loose, low-density pellets that fail durability tests.
(Related machine: high-capacity corn stalk pellet machine)
Step 7: Cooling—Do Not Rush It
Freshly extruded pellets exit the straw pelletizer at 80–90°C. They are soft and full of internal stress. If they are bagged immediately, they will crush each other, generating fines and reducing bulk density.
Use a counter-flow cooler to bring pellet temperature down to within 5°C of ambient. The cooling time should be at least 10–15 minutes for fuel pellets and 20–30 minutes for feed pellets. Rushing this step is one of the most common causes of quality failure.
After cooling, pellets should have a moisture content below 10% and a surface that is smooth, shiny, and free of cracks. If pellets look rough, cracked, or dusty after cooling, the problem is almost always upstream—in drying, conditioning, or pelletizer settings.
Step 8: Additives and Binders—When Natural Lignin Is Not Enough
Some agricultural residues have low lignin content, which means they do not bind well during pelletizing. Wheat straw and corn stover have moderate lignin (15–20%), but rice straw and cotton stalk can be as low as 8–12%.
When natural binding is insufficient, additives can make the difference between acceptable pellets and premium pellets.
Sawdust is the most common binder. Adding 10–20% sawdust to low-lignin materials dramatically improves durability. Sawdust is rich in natural lignin, which activates during pelletizing and acts as glue.
Starch-based binders (corn starch, wheat starch, or tapioca starch) work well for feed pellets. They improve digestibility and pellet hardness.
Lignin-rich additives like bark dust or coffee grounds can also be used.
Oil-based binders (soybean oil, rapeseed oil) at 2–5% addition improve pellet density and reduce die wear. They also increase calorific value.
The key is to test small batches before scaling up. A 5% addition of sawdust to rice straw, for example, can increase durability from 92% to 98%—the difference between a rejected shipment and a premium sale.
Step 9: Quality Control—Test Everything
You cannot improve what you do not measure. A basic quality control protocol should include:
- Moisture testing on every batch using a calibrated moisture meter. Target: 8–10% for fuel, 10–12% for feed.
- Durability testing using a tumble tester (e.g., Holmen N100). Target: above 97.5% for fuel.
- Ash content testing via laboratory analysis. Target: below 6% for fuel.
- Calorific value testing using a bomb calorimeter. Target: 16–20 MJ/kg.
- Visual inspection of every batch. Look for cracks, dust, color variation, and size inconsistency.
For small operations, a moisture meter and a durability tester are sufficient to catch 90% of quality problems. For larger operations, invest in a full lab or partner with a third-party testing service.
Common Quality Problems and How to Fix Them
Problem: Pellets crumble during transport.
Root cause: Low durability, usually from insufficient moisture control or low lignin content.
Fix: Reduce raw material moisture to 10–12%. Add 10–15% sawdust as binder. Check straw pelletizer die for wear.
Problem: Pellets are too soft.
Root cause: Moisture above 12% or die temperature too low.
Fix: Increase dryer output. Check conditioner steam flow. Verify die and roller gap.
Problem: Excessive dust and fines.
Root cause: Oversized raw material, worn die, or rapid cooling.
Fix: Replace hammer mill screen. Inspect and replace die if worn. Extend cooling time.
Problem: Pellets crack after cooling.
Root cause: Rapid cooling or moisture above 12%.
Fix: Use a counter-flow cooler. Reduce final moisture to below 10%.
Problem: Low calorific value.
Root cause: High ash content from contaminated feedstock or excessive binder.
Fix: Improve raw material sorting. Reduce binder addition to below 10%.
Conclusion
Improving agricultural waste pellet quality is not about any single magic fix. It is about getting every step right—from feedstock selection to sorting, crushing, drying, conditioning, pelletizing, cooling, and packaging. The straw pelletizer is the engine of this process, but it is only as good as the material fed into it and the parameters it is operated under.
The producers who will thrive in this market are not the ones with the biggest machines. They are the ones with the tightest quality control, the cleanest feedstock, the best-maintained dies, and the discipline to test every batch. Quality is not a cost—it is an investment that pays for itself in higher prices, lower rejection rates, and stronger buyer relationships. The residue sitting in your field today is worth more than you think. But only if you treat it right.